Sunday, November 20, 2011

CHRISTMAS CARD 2011

I try to send a few Christmas cards every year, not always successful, but I have the best intentions.  So, this year I decided I would try making them and that way I would be sure to get them mailed out. You know putting in all the effort, I'm not going to leave them sitting around.  I asked my Mom if she wanted a few and of course she does.  So, here are our Christmas cards for this year.


I started with some blank cards and envelopes I have had for a while.  I found the design on a blog I found on Pinterest and made some changes to fit us. I then cut all the papers and prepared the pieces for the 10 cards.


I made one card and then made changes to get it to what we wanted.  I then prepared all the pieces before assembling the rest of them.  It made for a quicker assembly. I started by cutting the cardstock and scrapbook paper I was using to the proper sizes I wanted. 

I couldn't find a poinsetta flower that I liked to put on the candle, so I punched out some flowers from a flower punch I bought at Hobby Lobby.  I then rubbed some yellow chalk on the center of one of the flower with a cotton swab. (Sorry it is hard to see the yellow center.)  I put a red brad through the center of two flowers so that I could attach them to the card.


I made enough flowers to attach 2 on each card.


I took a piece of vellum that I had cut to the deisred size and cut a notch in it to look like a banner/flag, then stamped Merry Christmas on it.  I used brush markers on all of my stamps so they would stamp cleaner.


I then stamped each of the pieces of cardstock for the inside pieces.


I then made the candle that goes on the front.  After cutting the card to the proper size, I then used my corner punch to round the corners to make it look like the top of a candle. I got an idea from the blog I got the card design from for the candle.  They took some glue dots and stretched them down the card to make it look like candle wax that had melted down the candle.  It didn't work for me, so I had used my adhesive tape and then sprinkled the sugar glitter on top of it. I think it worked great.


I then put everything together starting with the front of the card.  I finished off the candle by using a black gel pin to make the wick.  I then rub 3 different colors of chalk around the wick to make it look like the candle was lit and glowing.


 I then attached the vellum banner and then the flowers I made earlier.  I then attached the two pieces I stamped for the inside of the card. 


Oh, and of course I stamped the back of the card with a "designed by" stamp and signed it.  Hope this card encourages you to create your own card.  It really is a lot of fun.  I love to see the finished product and the joy it brings those I send it to.


Tuesday, November 15, 2011

CHICKEN PILLOWS

I found this recipe from a posting on the Philadelphia Cream Cheese facebook posting.  I have converted it to a Weight Watchers PointsPlus friendly meal.  It is a great and easy make ahead freezer meal.  So far I haven't found anyone that doesn't like it.

My mom was sweet to cook a whole chicken the other day in preparation for this.  She even boned the chicken and chopped it.  It sure made it easy when it came time to put these together.  Now, one more thing is we kept the broth from the chicken and froze it.  We do this a lot, this way we know how much sodium we have in our chicken broth and it saves us money in the long run.  We have done this with vegetables, also, and it makes great vegetable soup stock.

This is an incredibly easy recipe and it is a lot of fun to make it with someone.  My mom and I like making it together because it does help to have an extra hand.  While one is pinching the crescent rolls together, the other can be putting the mixture on them.  And it also helps to speed things up for one to make them into the pillows while the other puts them in the butter and the bread crumbs.


Back to the recipe.  Below is the recipe.  

Chicken Pillows

Ingredients:

1 cup fat-free cream cheese
1/2 cup light sour cream
1/2 tsp. salt
1/4 tsp black pepper
1 1/2 Tbsp. Chives, freeze-dried
1 1/2 Tbsp. onion(s), chopped or dried minced onions
3 cups Chicken breast, chopped
8 oz. reduced-fat crescent roll dough
1/4 cup I Can't Believe It's Not Butter! Soft Margarine or similar margarine
1 cup Seasoned Bread Crumbs
1 can condensed cream of chicken soup
1 package McCormick Chicken Gravy Mix

Instructions:

1. Usiing a mixer, beat cream cheese and sour cream until well combined.  Add in salt, pepper, onion, chives, and diced chicken.

(This picture is everything before the chicken.  Normally I use an onion, but today it was early and didn't want to go to work smelling like an onion so I used minced onions.)

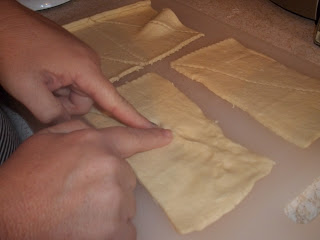
2. Using reduced fat crescent rolls, take 2 triangular pieces and push together at perforated seam to make into a square.  make sure you seal the perforations well so your filling doesn't come out.  Put about 3 tablespoons of chicken misture in the center of each square. Fold the dough corners to the center over the chicken mixture forming a pillow.


3.  Dip each pillow in melted butter on both sides.  Roll in bread crumbs on both sides.  Shake excess crumbs off.  Place chicken pillow on cookie sheet and bake at 350 degrees for 20-25 minutes.


4. Make gravy by mixing one package of chicken gravy mix, one can of cream of chicken soup and 3/4 can of water in a small pot.  Mix together and heat until warm.  Serve chicken pillows with gravy spooned over the top.


The Chicken Pillows with the gravy has a PointsPlus value of 10.  It serves 8.  The above plate is a total of 10 points as the green beans and carrots have a 0 PointsPlus value.

Now to freeze them for future meals.  My mom and I made 24 pillows and froze all but 7 of them (lunch today).  To freeze them, make up the pillows to the 2nd step (prior to the butter and bread crumbs).  Put them on a cookie sheet, uncovered and place them in the freezer for a few hours or until they are firmly frozen.  Once they are frozen remove them from the freezer and put them in a freezer bag.  You can remove as many as you want and the bake them according to step 3 and make the gravy at that time according to step 4 of the recipe.

I hope your family and friends enjoy this recipe as much as my family does.  I love anything that is easy, yummy and works with my new lifestyle.  ENJOY!!


Thursday, November 3, 2011

FALL INITIAL WREATH

Most of my crafting at this time is Christmas gifts and I can't post them till close or after Christmas.  I will still post a few things here and there to keep you encouraged in crafting.  Prior to building my blog I created a wreath for my mom's front door.  I got the idea for the wreath from a wreath I saw on Pinterest.  I am sorry I don't have pictures of anything, but the finished product, but I will give you a list of the items needed to complete this wreath.

Grapevine Wreath (the size is up to you)
2 Autumn leaf garlands (I used ones with 2 different colors of leaves)
2 large fall colored artificial flowers
2 gourd picks
hot glue gun and glue sticks
pressed wood letter
acrylic paint
sponge paint brush

The first thing I did was to wrap the two garlands together to make them look like the belonged together.  The wreath was laying flat on the table and I laid the garland around the front of the wreath.  I took the wire ends of the garland and worked them into the wreath.  I then hot glued a few places around the wreath and garland so as to attach the garland in a few places on the wreath. I then placed the large flowers in two different places (where I liked them) and wrapped the wire through the wreath and hot glued to help secure.  I then did the same thing with the gourds, however, I placed them near the flowers.  Secure with hot glue.

Prior to putting the wreath together I painted the letter (I chose the letter "A" because it is our last initial) with an off white acrylic paint.  Once it was dry I took a strip of ribbon that would wrap around the wreath and hot glued both ends of the ribbon to the letter.  I then hung it on the outside of our screen door.  I will make a similar wreath for Christmas and will post about that one as it will be a bit different.  I will be making it with a green wreath.


I have attached a couple of different pictures of the wreath.  Hope this encourages you to dress up the outside of your house for the fall season.  This wreath will take you from Halloween through Thanksgiving.  It's a great way to welcome your friends and your family in a warm way to your home.  HAPPY CRAFTING!!!